My Git Workflow for Developing New Features
It isn’t very hard to learn basic git commands, but forming your workflow can be very overwhelming as you need to combine these commands.
The workflow that I’ve been using consistently for almost 5 years actually was shown to me by my colleague Mikhail Golubev when I
was still an intern (thank you, Misha, for always being there to offer your advice and help!).
I’ve made small adjustments of my own over the years but basically I do the same sequence of git commands with
the help of IntelliJ’s git support every time when I develop a new feature.
In this post you can find a step-by-step guide on how to do the same using your IntelliJ-based IDE.
1. Create a new branch
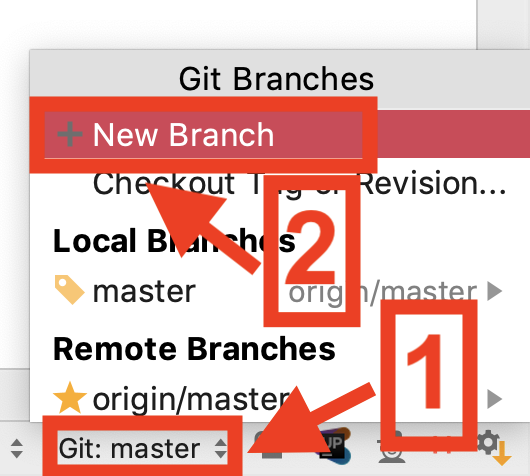
“New Branch” action shows dialog suggesting to name your branch.
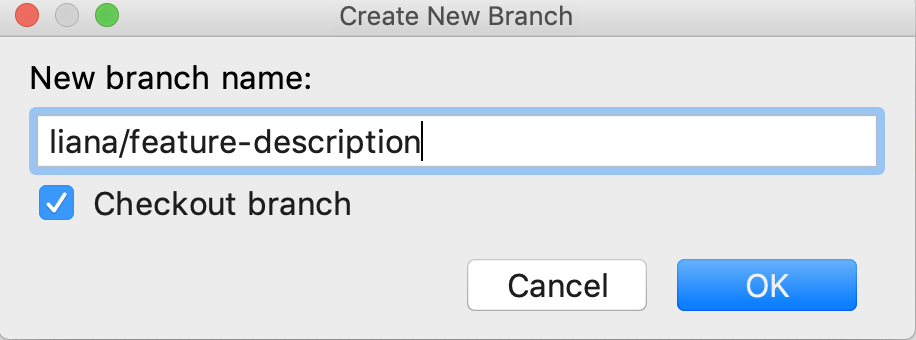
We usually use <developer name>/<feature description or issue id> pattern for naming. When there are lots of branches,
this pattern makes it easier to find specific branch if you want to return to it later.
I personally never use issue ids and don’t recommend it, because I’m not a robot and not very good at remembering numbers, but
I usually invent the same name for the same thing even several months later, so I don’t need to search for the issue in order to
find branch.
2. Checkout your new branch
By default (if “checkout branch” checkbox from “New Branch” dialog is on) IDE switches to your newly created branch, so you don’t need to do anything.
3. Develop feature
The most useful recommendation here is to make really small atomic commits. There are many reasons for that: for example, it’s easier to understand why the changes were made later. It’s also much easier to clean up git history later if you have very small commits.
I usually commit from Version Control Tool Window:
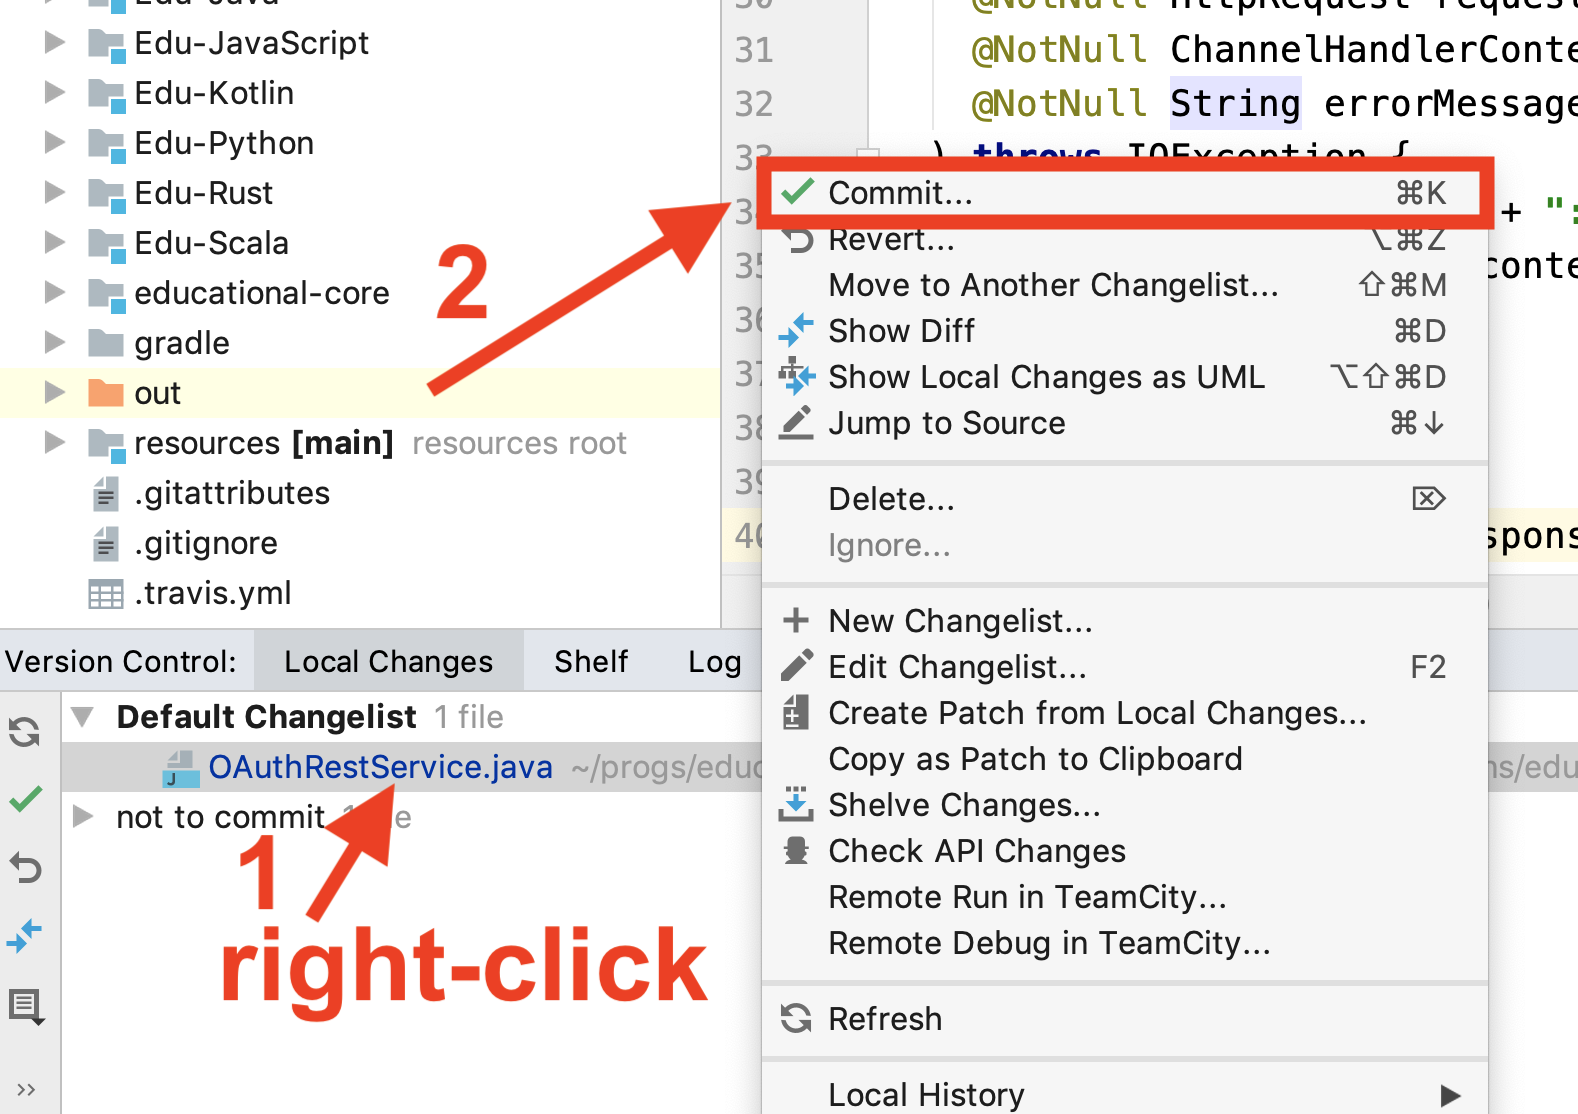
Before committing my changes I usually look through them to make sure that I don’t have any accidental changes.
4. Clean up git history
Before giving my code to reviewers I always clean up git history.
To do that I once again go to super useful Version Control Tool Window and select my branch:
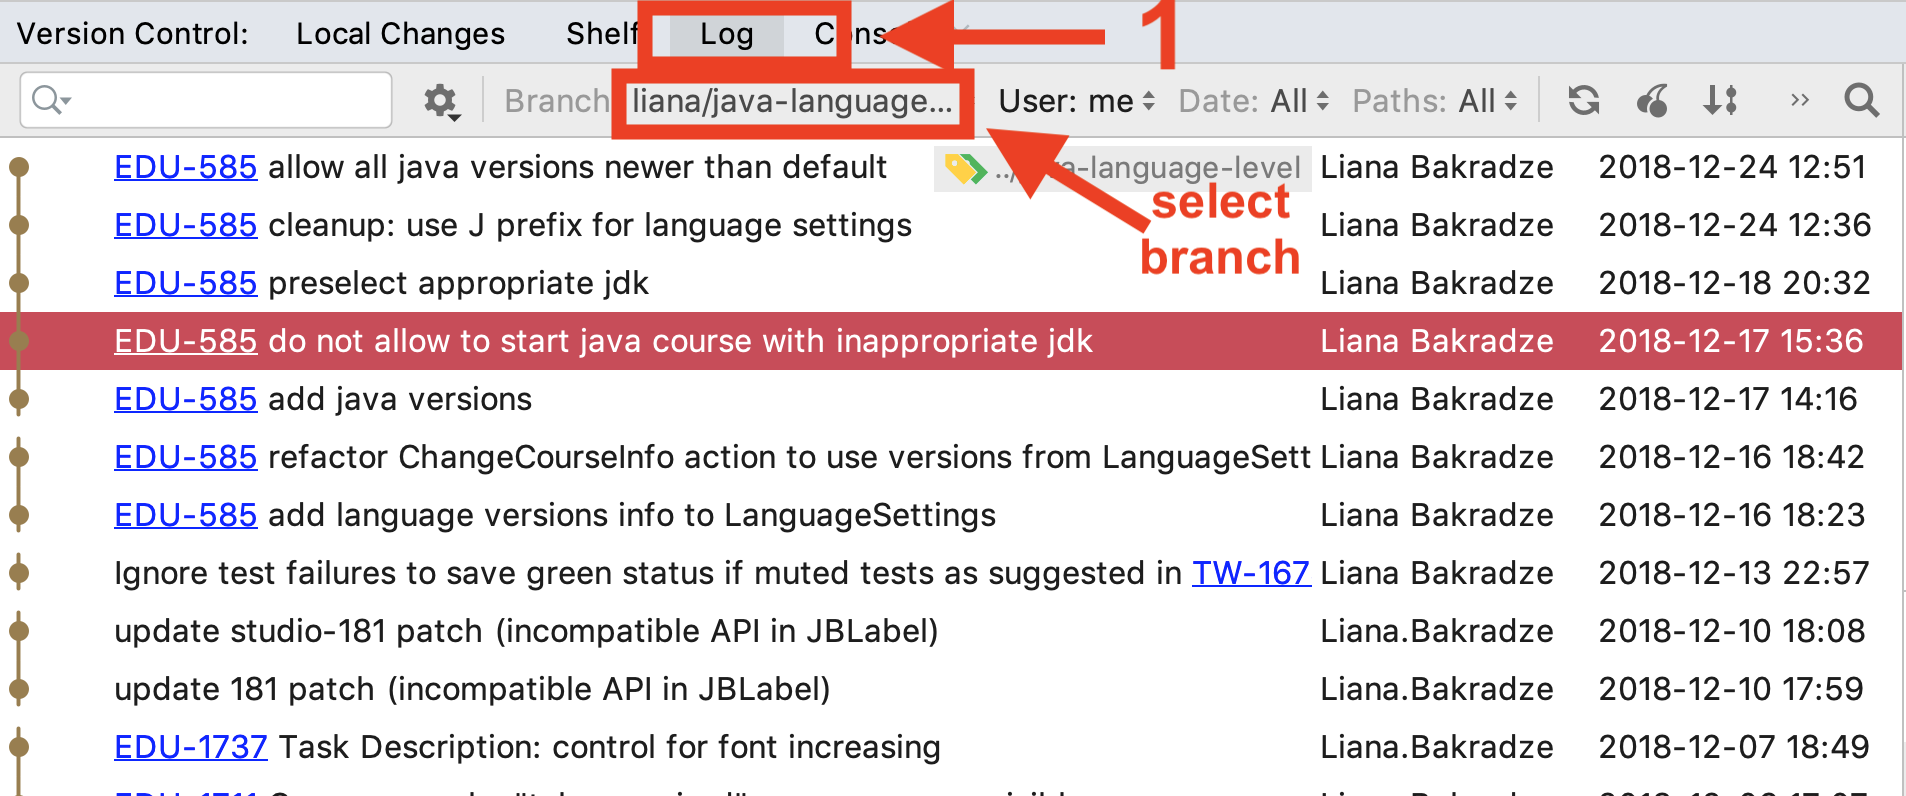
From the Log I can now modify git history.
I usually use only two actions: “Reword Commit” and “Interactively Rebase from Here…”
To reword a commit one needs to select it in the Log and simply invoke “Reword Commit” action from context menu:
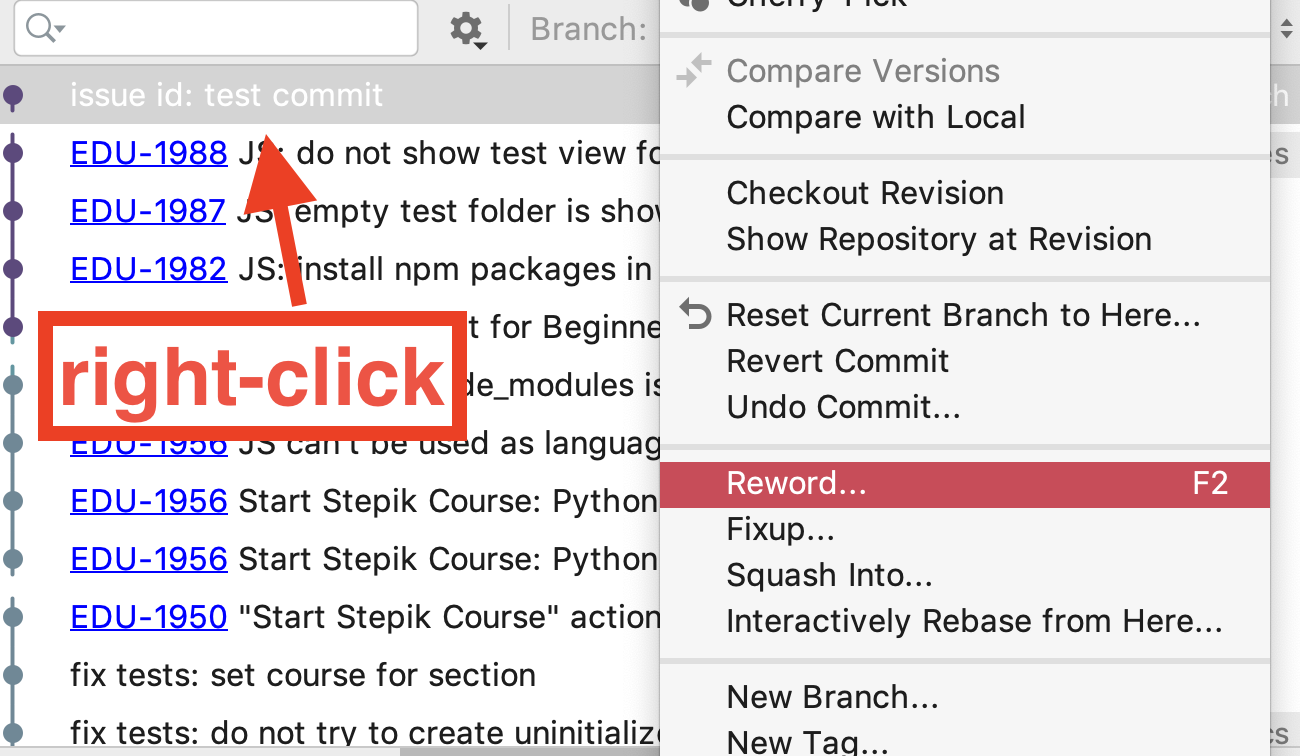
“Interactively Rebase from Here..” allows to do more advanced stuff: like squashing commits or even editing the files from a commit. I’ll refer here to the page from IJ documentation (“Edit the history of the current branch” section)
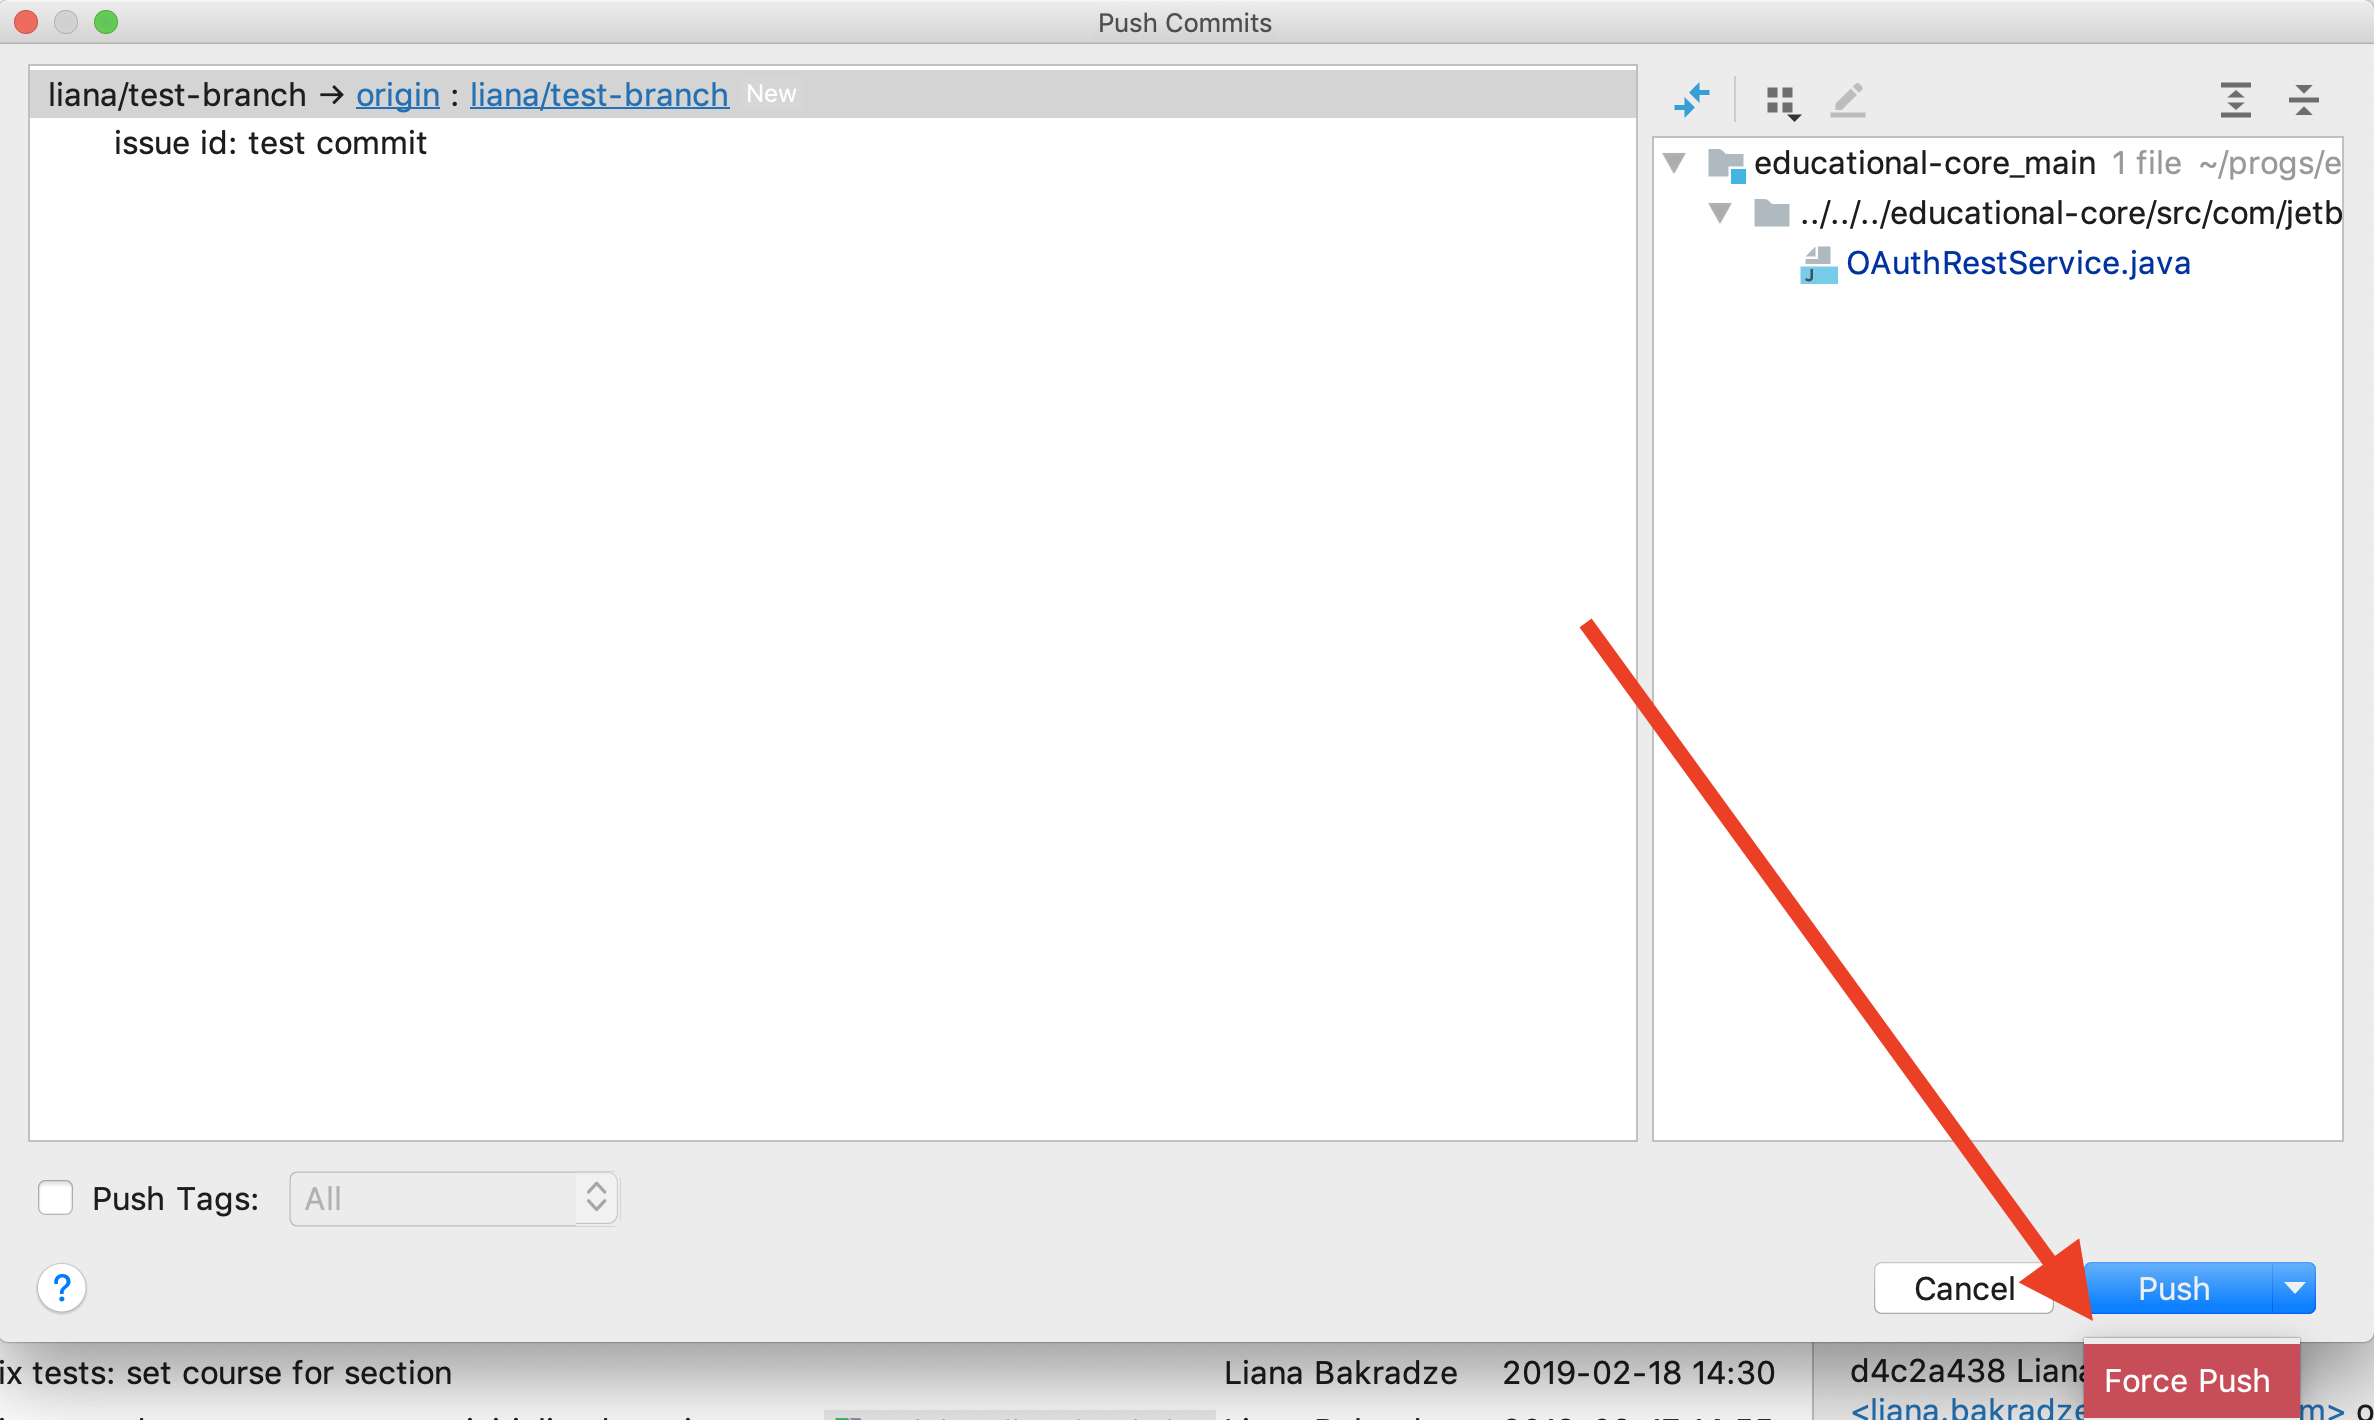
Once I’ve done with clean up, I need to “force push” the changes into my branch, because I need to override the branch on our git server. Force push action can be found in VCS menu -> Git..-> Push… (click “arrow” to expand):
5. Give to review
During review there are normally several fixes that need to be made. I simply do them as separate commits to my branch trying to make commits as small as possible because later I want to get rid of these commits.
6. Rebase on master
Once review is finished I rebase my branch on top of current master:
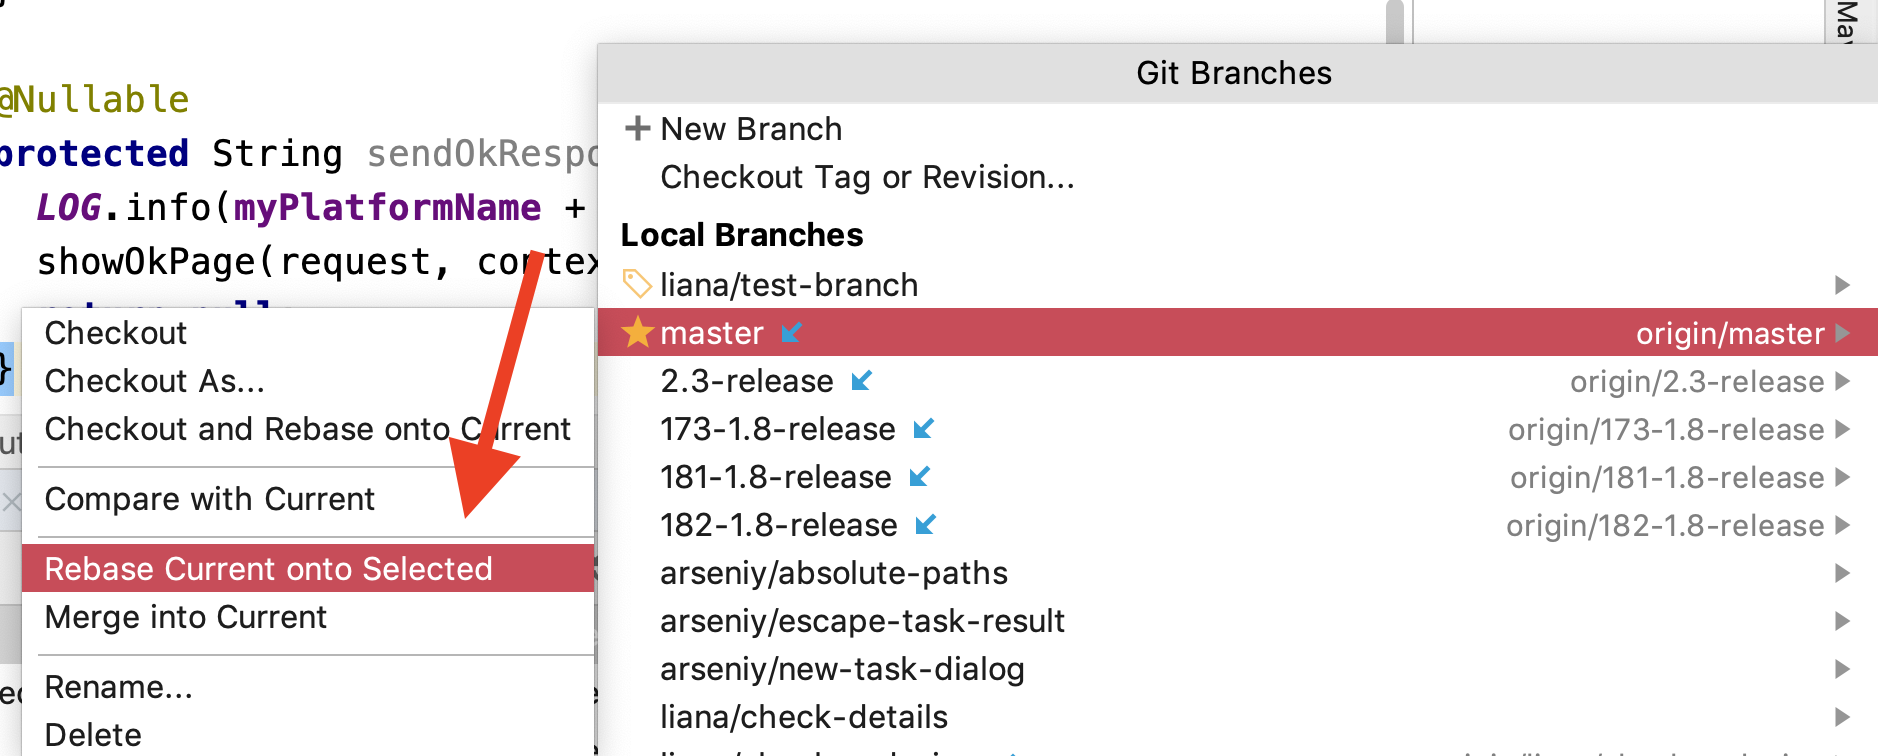
Note: you need to be in your branch to rebase it on master.
7. Cleanup review fixes
Now all my commits made to feature branch are on top of master. It’s time to clean up git history the last time before I put the changes in master branch. I use the same two actions from step 4. Usually I “fixup” small fixes such as renames, code style changes on commits where things that I fix were introduced to make it appear in git history as if I made everything perfect on my first try without review comments. I do it not to cover my mistakes but because I think that these commits don’t provide any useful information in the future. Nobody cares that I renamed a constant after a comment in the review. If there are some conceptual changes that were made during the review I leave them as separate commits because commit messages contain explanations of why these changes were needed.
8. Merge into master
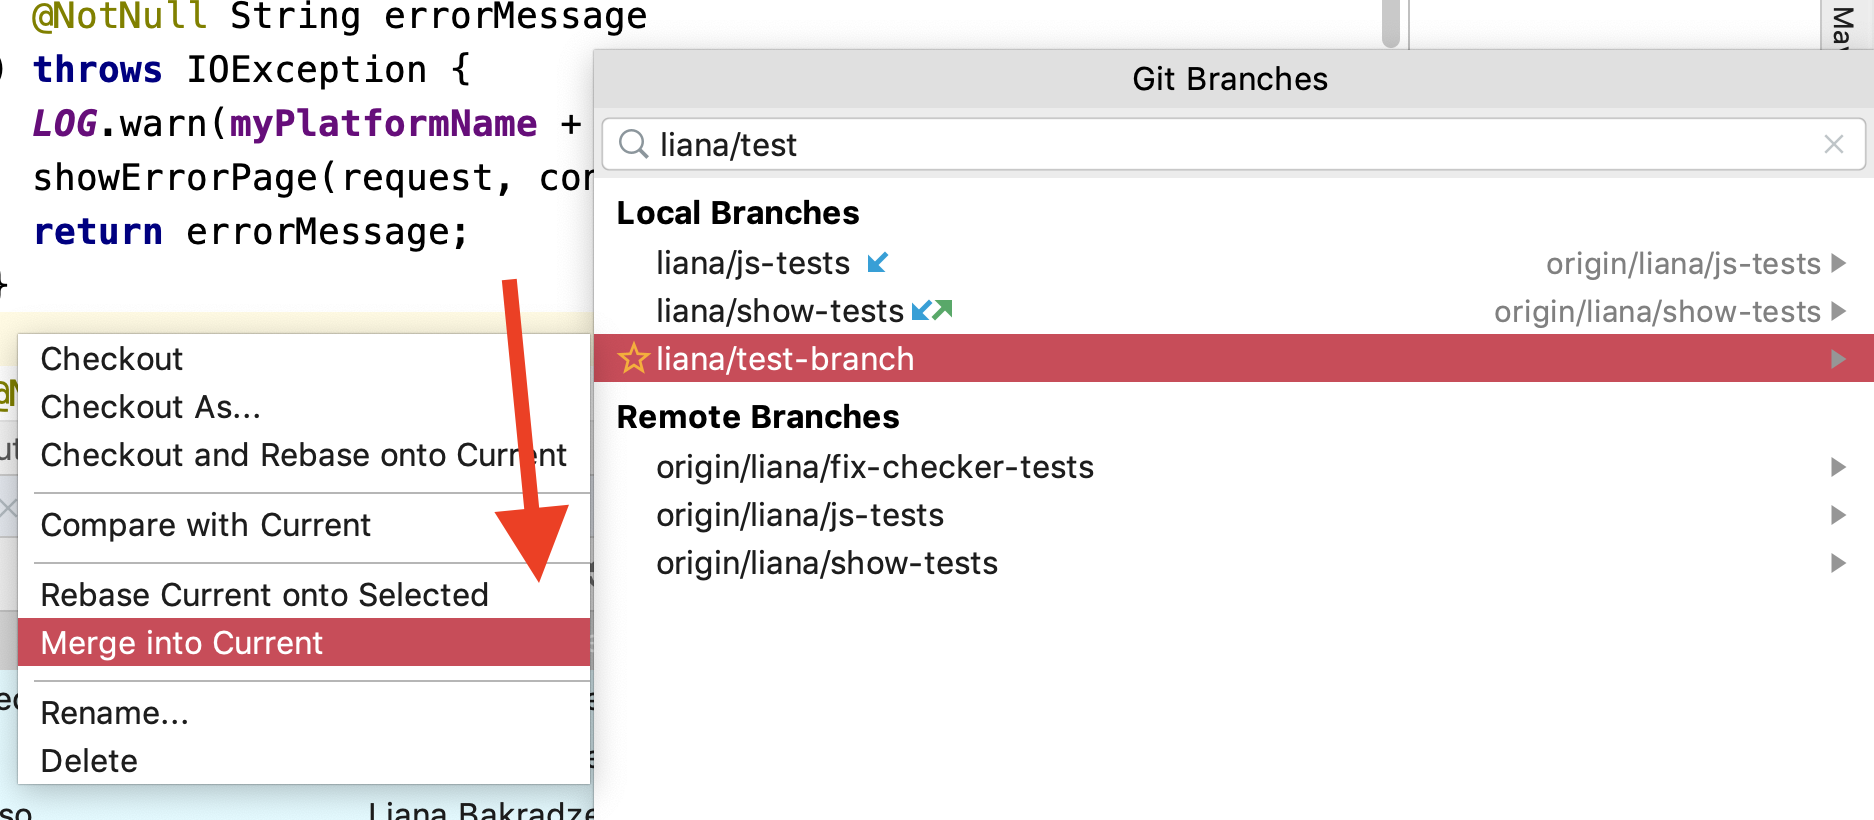
Once I’m happy with all the commits related to my new feature, I checkout master branch and merge my feature branch into it:
9. Push the changes to master
Almost ready! Now if we go to VCS menu -> Git..-> Push…, we can see our commits there. Before pushing the changes into master, I always check that compilation is not broken and the project can be built successfully.
Leave a comment